i've researched many ways to make them but i chose to make them with flannel, batting, canvas backing, grommets, and carabiner clips.
to make 1 hammock you will need:
1/2 yard flannel or cotton fabric for top of the hammock
1/2 yard cotton batting for padding in the middle
1/2 yard heavyweight canvas for the backing (denim would work well too)
4 - 1/2" grommets & grommet kit
4 carabiner clips such as lehigh spring links
scissors/xacto blade, sewing machine, thread
i order flannel fabric from websites like fabric.com or J&O fabrics when they are on clearance and buy several yards at a time. same goes for the heavyweight canvas fabric that i'll use for the backing. these hammocks, if going to an animal shelter, will have a lot of use and will need to stand up to it. i know people use old flannel sheets, pillow cases or clothes as well.
i buy grommets and lehigh aluminum spring clips at home depot or another carabiner clip at my local hardware store. these can be pricey and you need 4 per hammock, so i go to home depot where they are 98 cents/ea.
first, cut all 3 pieces of fabric (or 4, if you want to add 2 layers of cotton batting) 17" x 22": canvas, flannel & batting.
then layer them: canvas on the bottom and flannel on top, with right sides together. add the batting on top of the flannel. pin them to avoid slippage while sewing.
sew with a 1/2"-1" seam allowance (make sure you get all the layers) around the edge of the hammock, starting on a long side and leaving a ~4" inch gap un-sewn through which you will pull the fabric to turn it inside out afterwards. always backstitch over beginning and ending your sewing for reinforcement.
after you've sewn around the edge of the hammock, leaving 4" gap along a side, turn the hammock inside out. the flannel will be on top, canvas on the bottom, batting in the middle. poke a chopstick or pencil in the corners to get it completely turned inside out.
now fold/pin the gap closed with the raw edges tucked in and sew it shut with a 1/4" seam allowance - i.e., right along the edge to secure it.
next sew a rectangle on the inside of the hammock to provide extra support. you can also sew a design.
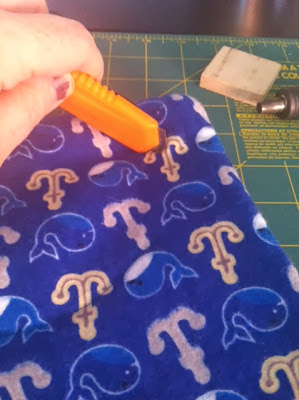
now you are ready to add the grommets. make sure you place them about 1.5" in from each corner. using your scissors or xacto, cut a *small* slit where you will add the grommet through all 3 layers of the hammock.
i fold the corner over and cut slowly with scissors. sometimes i can't get through to the canvas layer without making a bigger hole (you want a small hole so the grommet is snug around the edges of the fabric so it won't slip out and tear), so i poke the scissors through the hole in the flannel and batting through to the canvas.
using your grommet kit, from the bottom, slip the male grommet with the lip through the hole in the fabric and put the female grommet on top.
using the kit, hammer the grommet so it fits tightly around the hole in the fabric. male grommet on the bottom, female on the top side of the hammock. the instructions with the grommet kit will tell you specifics. repeat for each corner.
now you have a hammock waiting to make a kitty happy! use the carabiner clips to attach the to a cage at your local shelter. TIP: bring some catnip and sprinkle it on the hammock once you've hung it. they will jump into that hammock!
**also, if you want to bring an easy toy/s for cats at a shelter, collect wine corks in a jar or ziplock bag and add catnip so they absorb the scent. then bring them to your shelter and give one to each cat!
martha stewart shows you how to use carpet squares and chains with s-hooks
use old pillow cases to make cat hammocks
how to make a cat hammock with a frame for your home


